ZWO ASI183MM Pro Review
ROBSERVATORY #1
Today we’re reviewing the ASI183mm Pro by ZWO. What is this jumble of numbers and letters you ask? It is a dedicated, thermo-electrically cooled, monochromatic astronomy camera. How cool is it? Let’s find out.

This camera is based off Sony’s IMX183 20 megapixel camera sensor, it is extremely sensitive to light and has low read noise making it well suited for astrophotgraphy. The thermo-electric cooling on the chip as well as the large fan at the back of the unit help the camera cool down to 45 degrees Celcius below ambient temperature. This is what separates an astro camera from a regular camera, even a modified one at that. The cooling will drastically reduce noise produced by long exposure photography when the sensor heats up, and I use this camera to do 5 minute exposures most of the time.
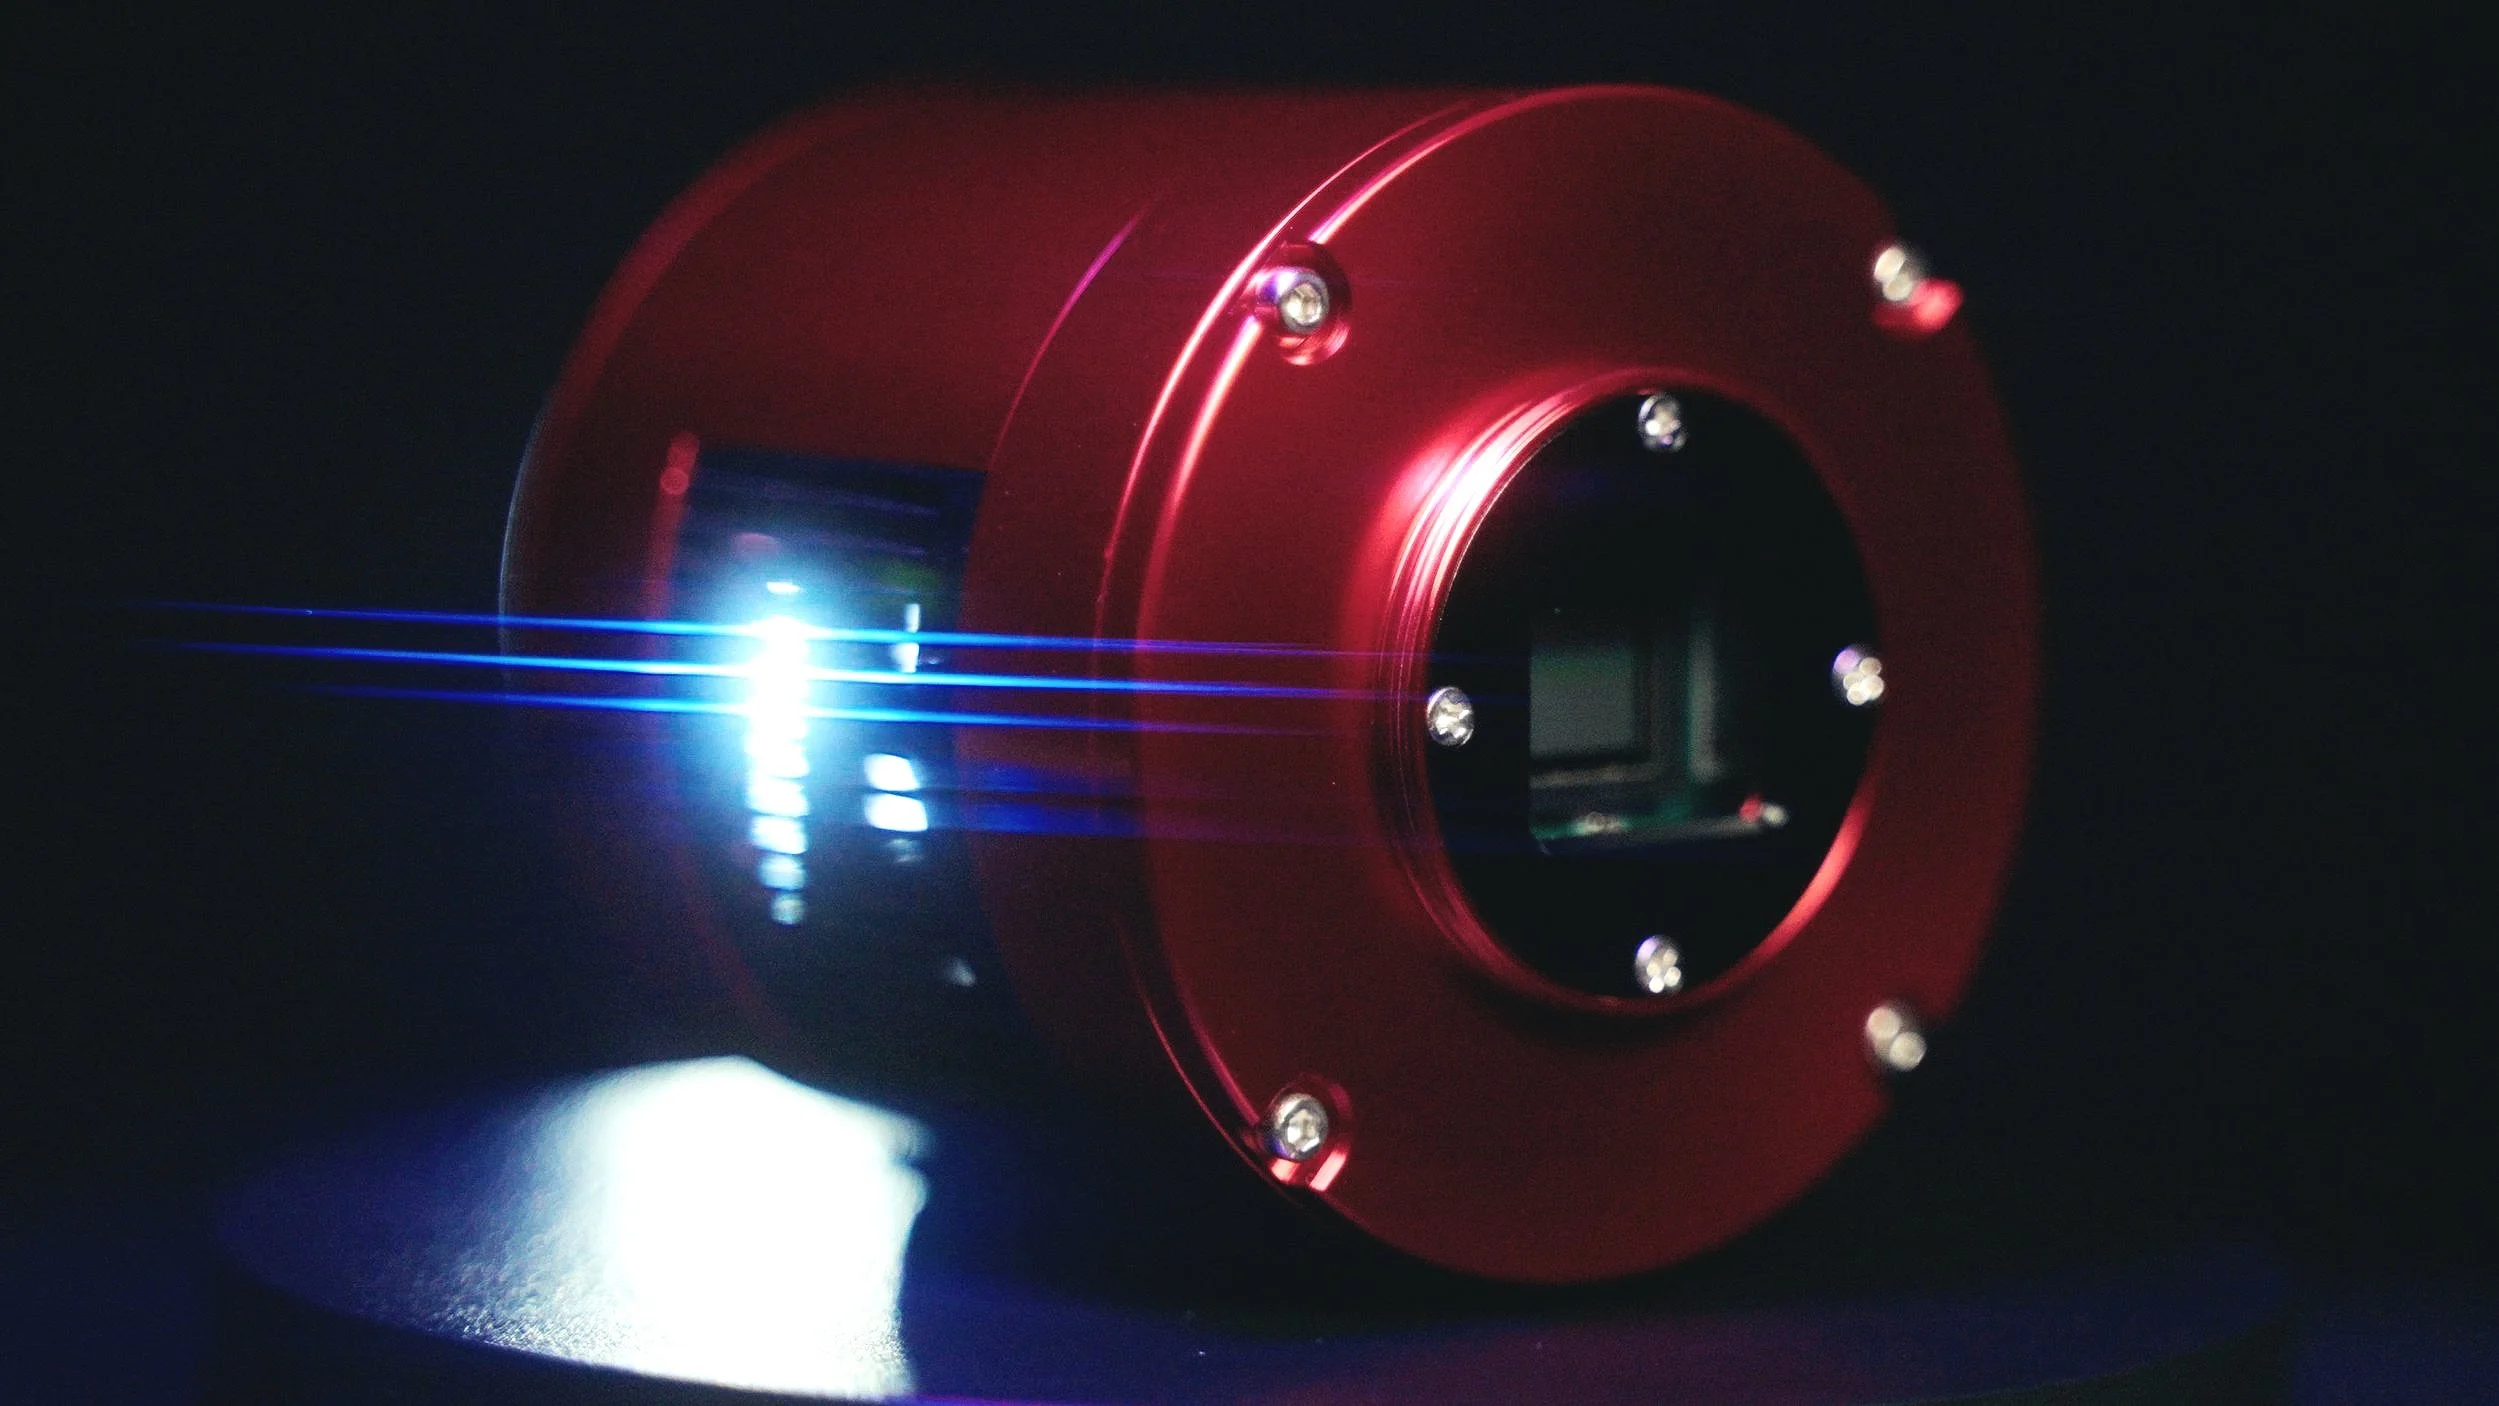
The stats sheet for the ZWO ASI183MM Pro, based on Sony’s IMX183 CMOS sensor.
Another separation from a traditional camera is the lack of a color matrix filter on the sensor, so instead of capturing a colour image, it will be black and white. Because a colour bayer filter captures colour as RGGB, meaning the pixels are grouped with one red, two green and one blue. Camera sensors are designed this way because the human favours the colour green, the issue is that there isn’t much green in space, so we are wasting 50% of our pixels. This is not the case with a monochromatic astro camera, but because of this we will have to use a series of filters to create colour images.
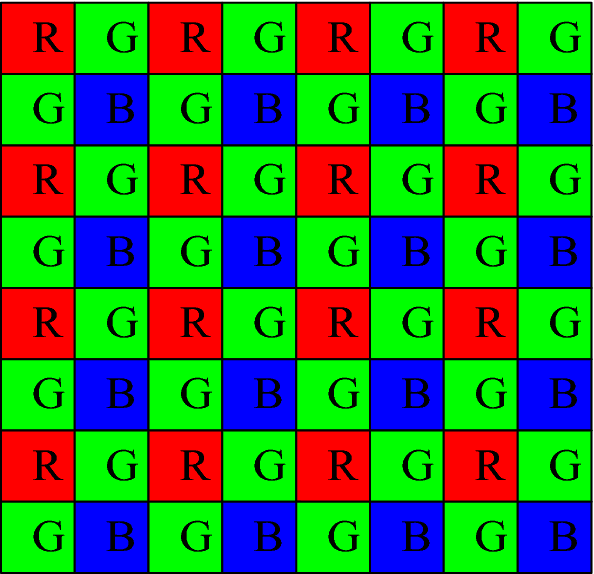
The bayer matrix of a normal, colour camera. Half the pixels are dedicated to capturing green, which is not a prominent colour in deep sky imaging.
Another benefit is that we can now use narrowband filters to capture the amazing coloured gas in nebulas, and narrowband imaging on a mono sensor is the #1 best way to beat light pollution. This can make the difference of whether or not you can even capture astronomy images where you live. I live in a Bortle 8-9 in the heart of the city, so the ability to shoot through narrrowband filters makes all the difference in the world.

A monochrome astronomy camera with narrowband filters is the number one way to overcome light pollution.
This camera does a 12bit analog to digital conversion and can support up to 19 frames per second at full resolution in video mode and can do well over 100 frames per second in 720p, so you can do lucky imaging with this camera. It has a 256mb DDR3 memory cache to help get data offloaded efficiently which is the main difference between the cool and pro versions of this camera. This also helps reduce amp glow. Compared to other astronomy cameras this one does suffer from a fair amount of amp glow, which is noise produced by the curcuitry connected to the sensor, it looks like this, but shooting dark frames for calibration will completely eliminate the amp glow from our final image. There is our second benefit of having a cooled camera, our dark frames will match our light frames temperature perfectly for a much better reduction of noise when we stack and integrate our images.
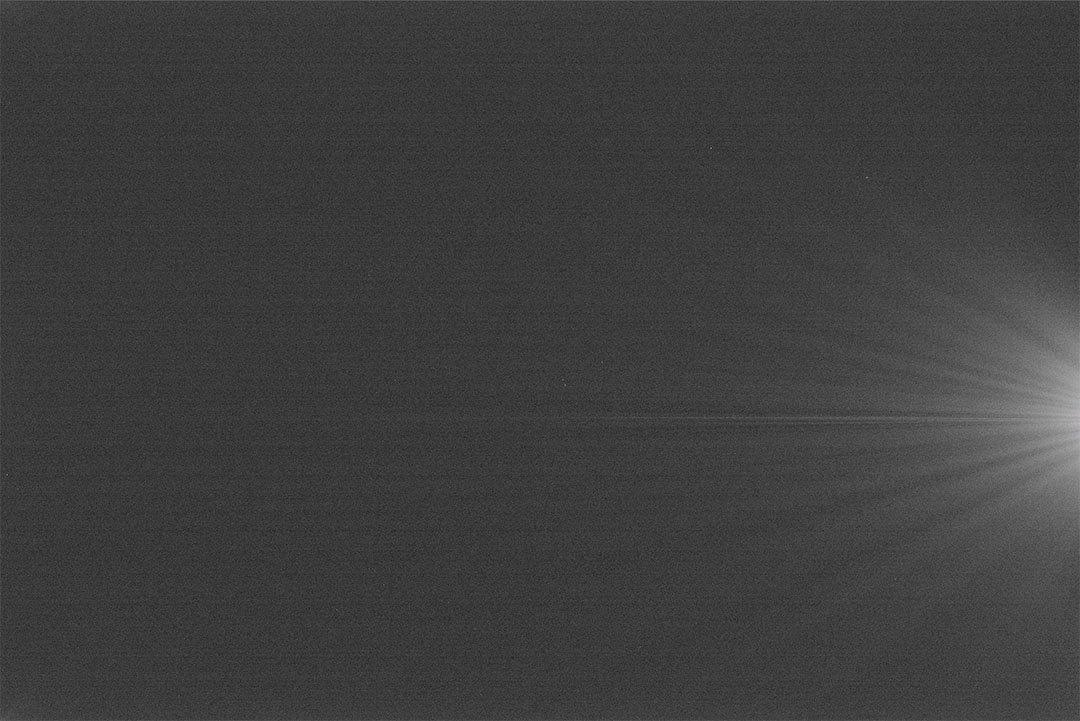
The amp glow in a single 300 second dark frame from the ASI183MM Pro.
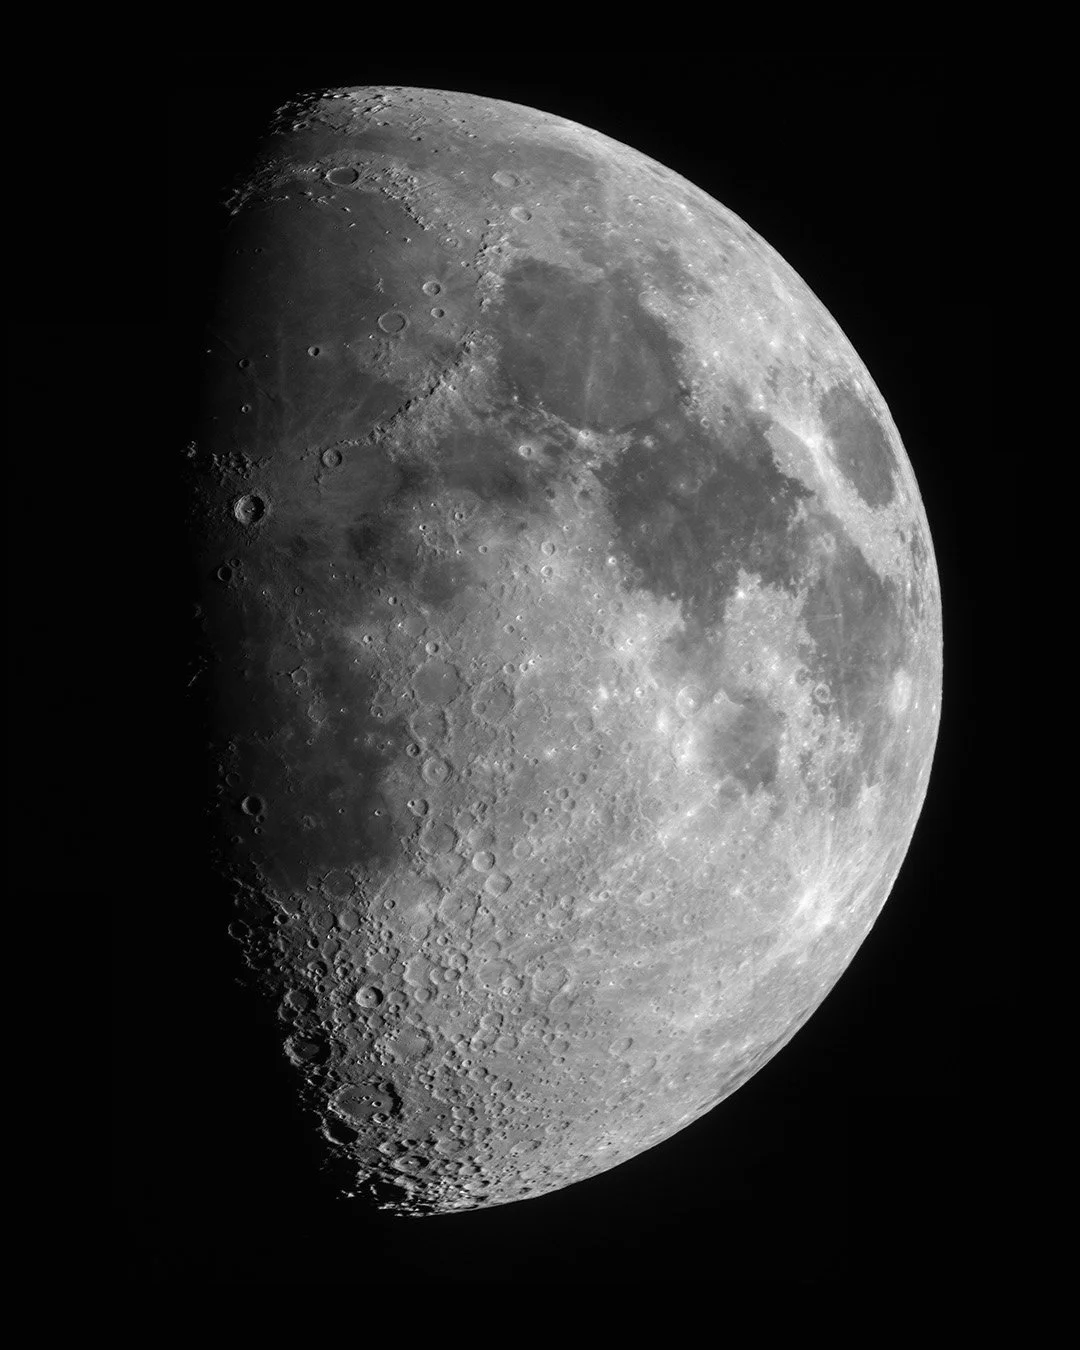
A image of our Moon made with the “lucky imaging” technique of using video frames from the ASI183MM Pro.
Now that we have looked at the internal specs, let’s kick the tires a bit.
The camera runs directly off of USB power, but for cooling you have to supply it with 12v DC power, so buy the additional power adapter in order to run the cooling system. You can run the camera via USB power for non cooled imaging. There is one USB 3 port for connecting to your computer or capture device, and a hub with two usb 2 ports for connecting accessories like your guiding camera and electronic filter wheel.
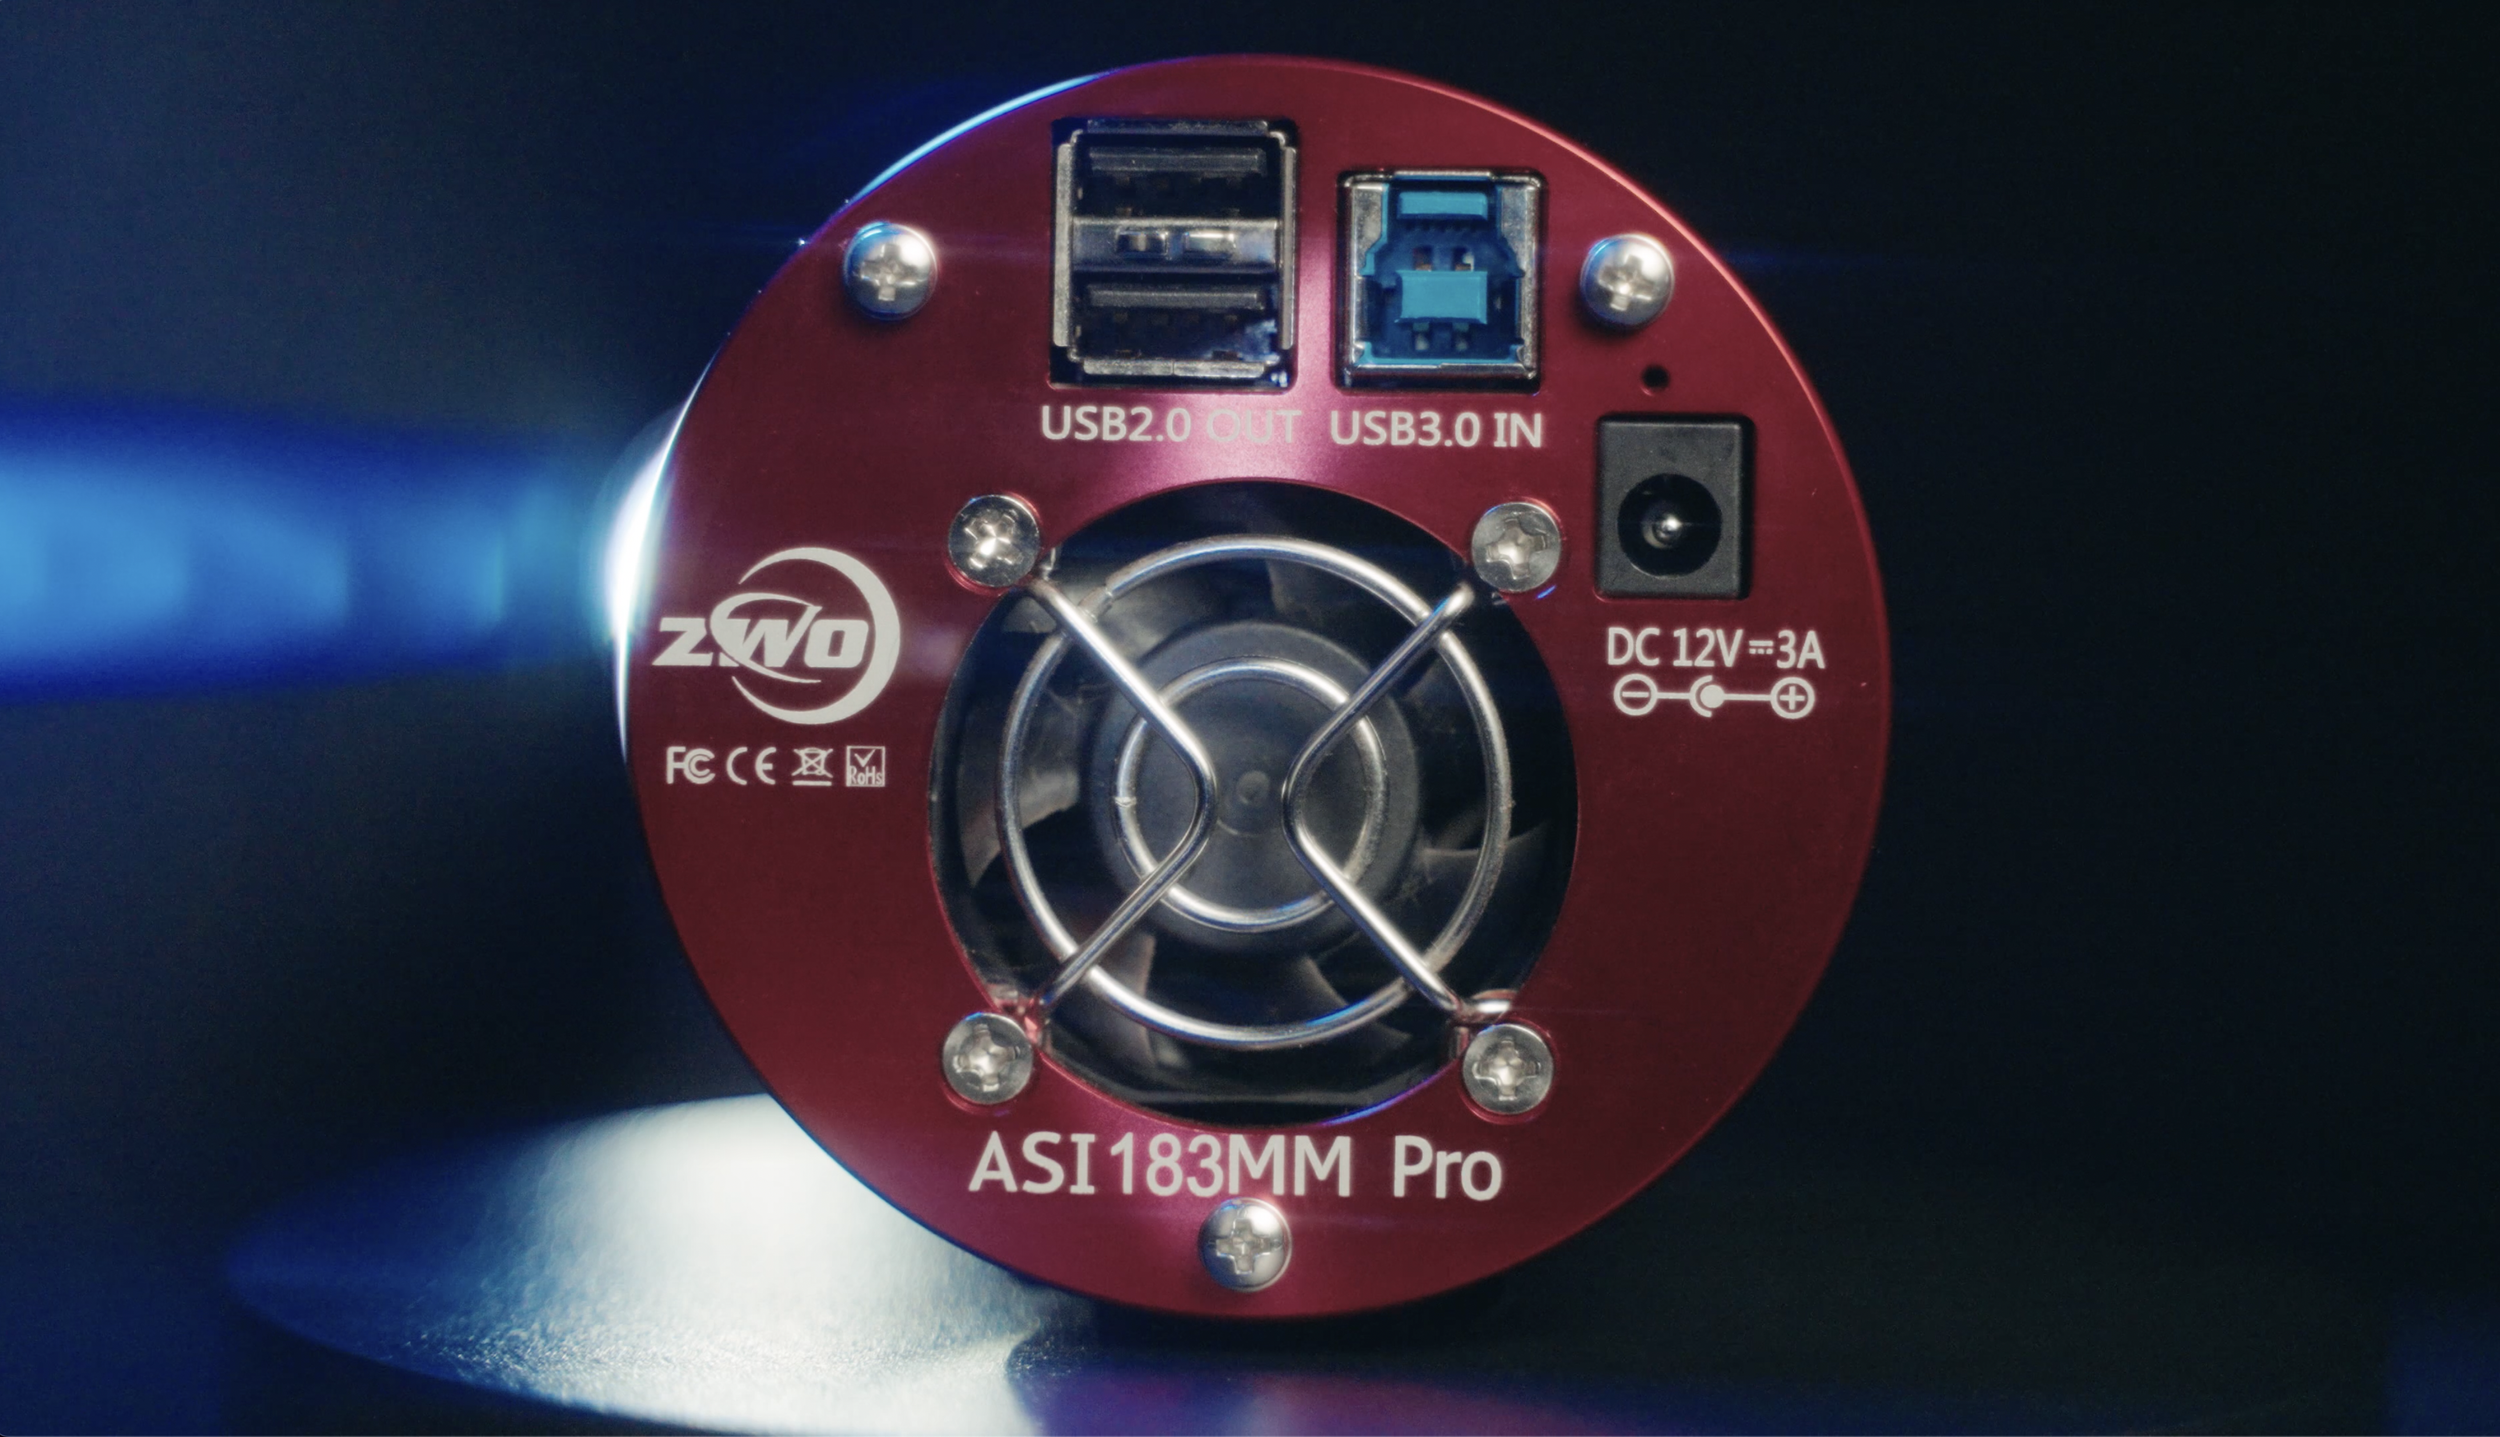
The ASI183MM Pro has a USB hub for connecting guiding cameras and filter wheels.
So that is what it is, but who is it for?
It is for the astrophotographer, who wants to to step up a dedicated astronomy camera from their dslr or mirrorless camera. Someone who wants a mono camera to make use of narrowband filters, and most importantly it is for someone who needs a camera with smaller pixels to make an ideal resolution match with their telescope, let me explain.
Mixing a camera and telescope is like pairing a fine wine with your meal, if you’re having a steak, go for a red, if you’re having salmon, a chilled white is a better choice. For a star to keep it’s nice round shape in a photo, it has to cover a certain number of pixels on the sensor. If it doesn’t, the details in your image start to look blocky. So depending on the telescope you use, the smaller pixels of the 183 may provide sharp detailed images with round stars or not. There is an online tool at astronomy.tools that can help you mix and match cameras and telescopes to determine the suitability of the pairing.
At this point I want to briefly touch on field of view and sensor size. Again we will use the incredibly useful astronomy.tools field of view calculator to spec out our gear before we pull the trigger on a new purchase. As a photographer I like to shoot a full frame 35mm sensor, so on the Redcat the image would use the full size of the lens and have a focal length of 250mm. Now let’s look at the much much smaller 1’ sensor of the 183 and see the effect that this sensor size has on the field of view. Wow, that is a lot different! The 1 inch sensor of the 183 has a crop factor or 2.7 times, meaning that the image it produces appears 2.7 times larger due to the sensor only using light from the centrer of the lens. This takes my redcat, which is 250mm in focal length to the equivalent of 675mm. That is a lot more reach and has the added benefit of only using the centre of the scope, where it is sharpest and best corrected. Because of this, I do not shoot flats to correct my images, which is a huge time saver, this means I don’t need bias frames either, so I only need dark frames for calibration. Amazing!
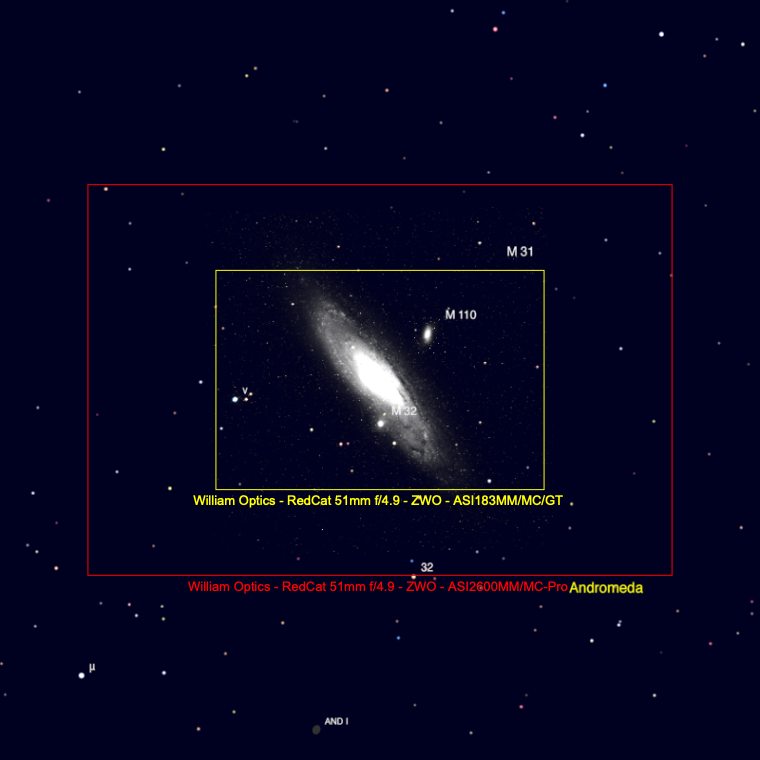
The difference between the field of view of the ASI183MM Pro and a camera with a larger sensor.
I am now pleased to share with you my first light images from my 183mm Pro. This is the Heart Nebula in the Constellation Cassiopeia over 7500 light years away in the Perseus arm of our Milky Way galaxy. I used the 183mm Pro with the Redcat51, an ASI 30 F4 mini guidescope, ASI 120 mini guide cam and the humble yet might SkyWatcher Star Adventurer mount to capture this image. The stunning colours are the result of using narrowband filters and editing them in the classic Hubble pallete. I used the budget friendly ZWO new narrowband 1.25” hydrogen alpha, sulphur ii and oxygen iii filters in the ZWO mini electronic filter wheel. These gases are being ionized by the powerful stars at the core of the nebula that are each some 50 times larger than our Sun. This is the result of 23 hours worth of 5 minute exposures.
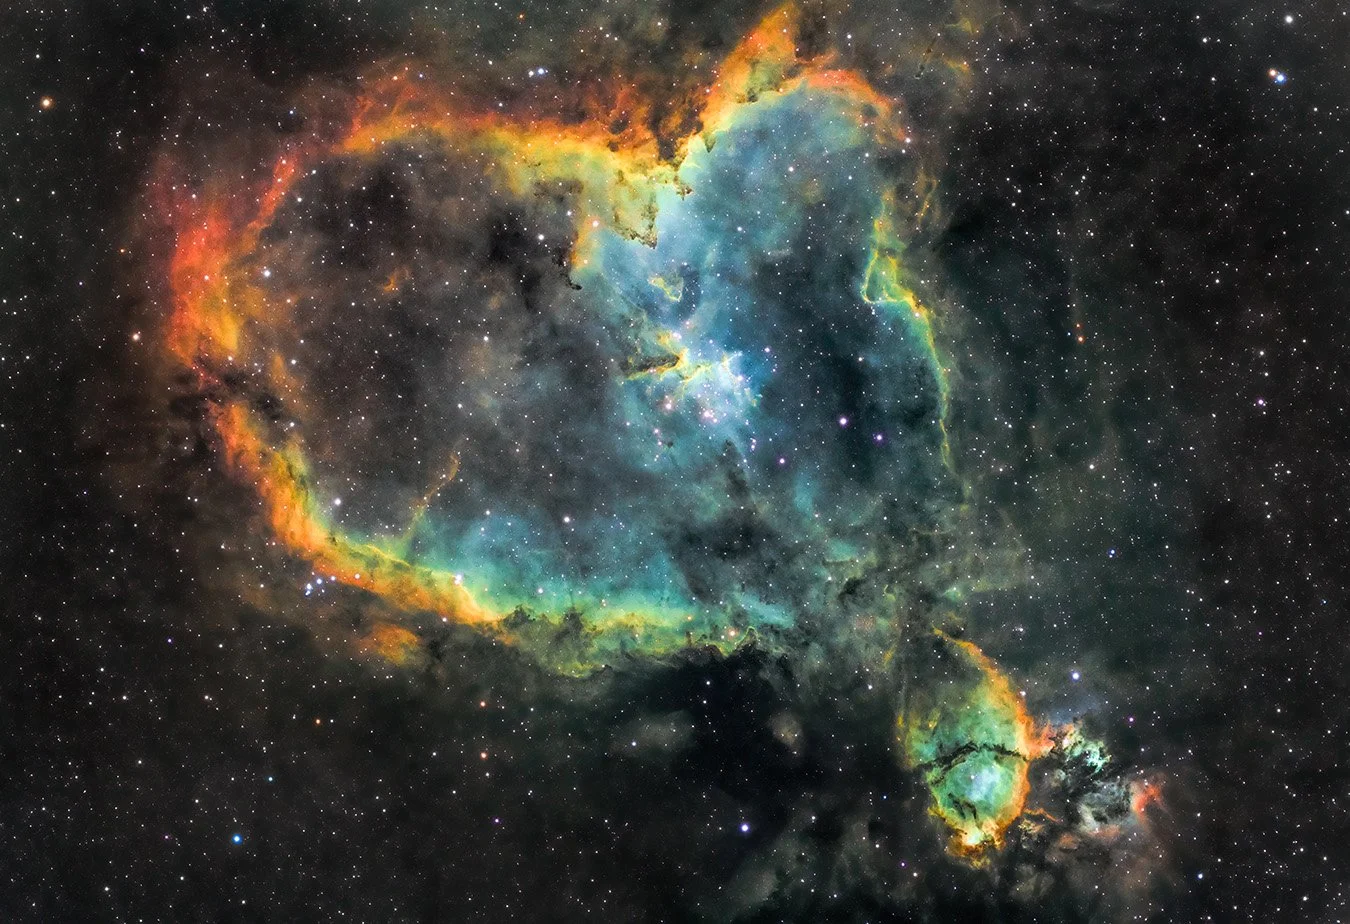
First light with the 183MM Pro, the Heart Nebula in the constellation Cassiopeia.
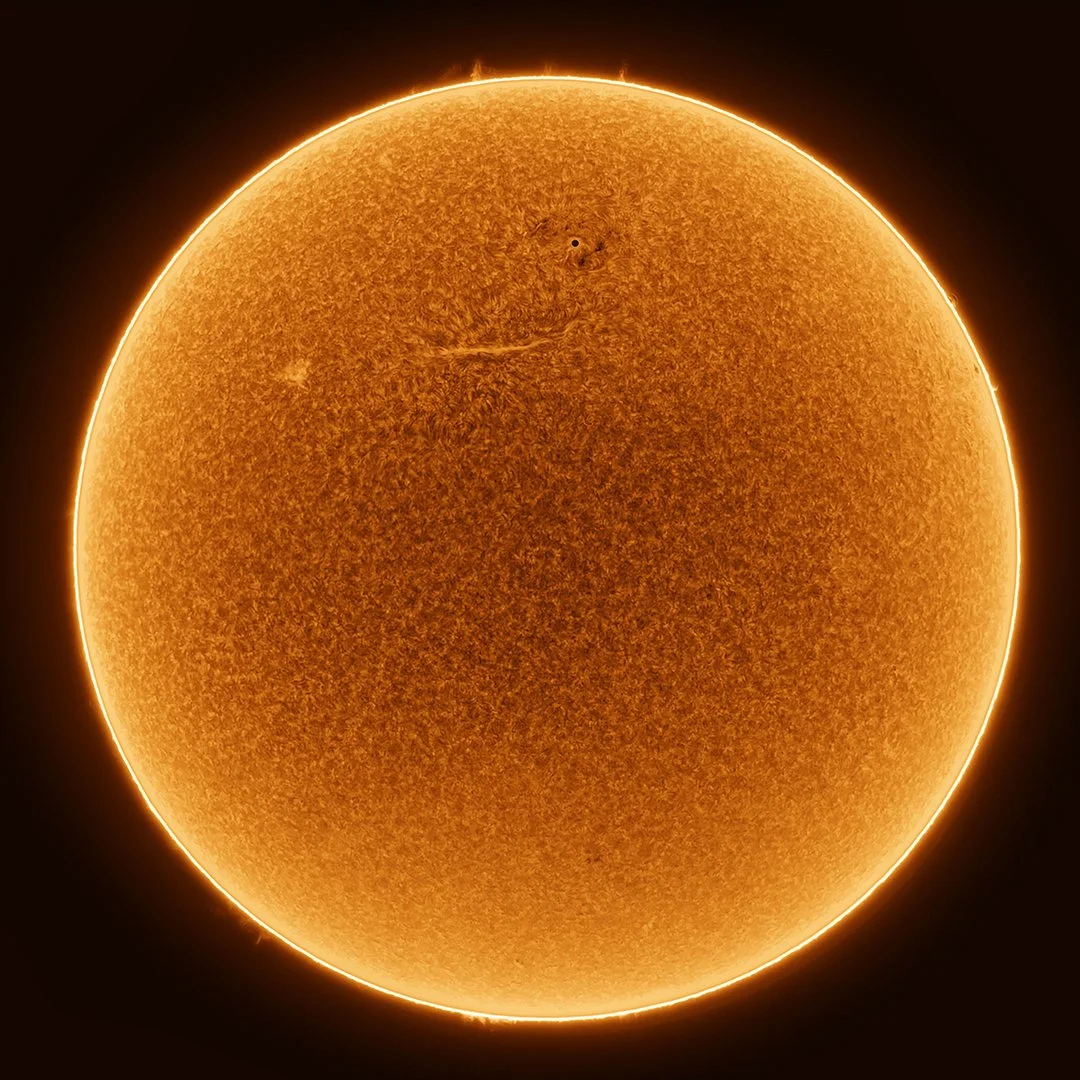
The 183mm Pro is not just good for deep sky imaging, it is wonderful for capturing high resolution images of our moon and the Sun. This solar image was captured with my Daystar DS 60mm hydrogen alpha solar scope, Please note I did stitch two images together for this image, the field of view was two tight on my current scope to capture full disc images in one shot.
In summary, this is real performer of an astro camera. I have had mine for over a year now and captured a lot of images and I am more than satisfied with the results. If you are looking at this camera then you are probably also looking at the 1600mm Pro, the main difference is going to be the pixel size and field of view when paired with your scopes, so use the astronomy.tools site linked below to calculate how either of these cameras will perform before you make a purchase. There is a colour version of this camera available, but for reasons I mentioned earlier I recommend the monochromatic version, more control, more efficient capturing, and narrowband imaging for making those beautiful Hubble pallet images. It requires more time, more gear and more money, but is absolutely worth it. Also other manufactures us the 183 sensor in their cameras, I have no experience with them, but I would expect them to have the same excellent performance. I hope you find this information useful in your astrophotography journey, but don’t take my word for it, get out there and see for yourself!